Lesson 3&4: Contacts tab
Contacts tab
Outcome:
- Know how to import and create contacts
- Understand different types of contacts and how to use them properly
- Understand the difference between groups and tags and be able to organize contacts with them.
- Learn how to create customized contact reports and find specific contacts
- Know the importance of Activities and how to record them
- Be able to perform configurations such as drop down list items, customized fields, etc.
New contacts
When you create a new contact on CiviCRM, it allows you to enter information for the following five different fields: Contact Details, Address, Communication Preference, Notes, Tags and Groups. These fields help you to organize and manage its contacts more efficiently and also are integrated with other CiviCRM features such as CiviMail, so now lets take a closer look at the functions each field serves:
- Contact Details
- This field contains the most basic information of a contact: name, email, phone, websites and more. You may add more than one email addresses, phone numbers and websites to one contact, but still set a primary one for contacting purposes. Also, CiviCRM allows you to upload an image for each contact. I personally think this feature is great if your organization work with a lot of volunteers or interns, and need to put a name to the face (or vice versa) in a short period of time. Also, it helps staff to recognize donors and supporters in events. No awkward handshakes and thinking, “snap, I what’s her/his name again?” will happen again!
- Address
- Address is a separate field from the above because address can be shared between contacts. For example, the office address of a partner organization can be used for the organization itself as well as its employees. Or, an address can be used by household members that are also contacts of your organization. We will talk more about contact types and how to connect them later in the lesson, but for now, just keep the “shared” concept in mind. Also, if you accept credit card payments, the address field also allows you to store the billing address of the contact.
- Communication Preference
- This field keep a record of how the contact want to (“Preferred Methods”) and don’t want to (“Privacy”) be contacted with. For instance, some people (like me) hate phone calls, and are efficient with emails, then their Preferred Methods will probably be emails, with a Do Not Phone privacy setting. This field also integrates with CiviMail. If a contact choose not to receive emails, CiviMail will exclude it from the bulk mailing list and the Send Email function. (CiviMail will be introduced in the near future. If you are slightly confused by what was mentioned, it is okay) Another useful feature in the field is the “Preferred Language”. If your organization works with a multi-lingual or non-English-speaking population, this feature will definitely help maintaining good communication.
- Notes
- This field is for you to “record random bits of information about a contact”, as it was stated in the users book. In my personal opinion, this could be used to record what kind of cake your contact likes so you can get the right flavor for her/his birthday. No conversations like “thanks, but I don’t really like chocolate/strawberry/cheesecake” will occur again. All jokes aside, when used properly and with some creativity, this field can be useful and beneficial to your organization.
- Tags and Groups
- This field allow you to categorize your contacts with multiple tags and groups. We will dig into Tags and Groups later in this lesson. For now, just note that they are powerful in organizing your contacts when when it comes to mailing or searching.
Individual v.s. Organization v.s. Household
Phew, we just read so much about what information you may record for a new contact, but wait, there is more! When you are creating a new contact, you need to choose from one of the three core contact types: Individual, Organization, or Household. We’ve briefly introduced their distinctions in the last lesson, but please allow me to say more about them.
In the way I see it, Organization and Household contacts are important not because you can add organizations and households to your contact list, but because they show the relationship and interconnectivity between the individual contacts. It’s different from Groups and Tags,because Groups and Tags are categorizations that their members might or might not have actual connection with one another, but Organization and Household contact types are people who work together or have associations with each other. Don’t think about “Organization contacts” as external, actual organizations, but rather a team of people. With that being said, you can create Organization Contacts for the organizations within your organization, and manage them with CiviCRM: add meeting notes as activities, add or remove members, record raised fund as contribution, etc. This concept may be clear in the next section which we talk about contact subtypes.
Contact subtypes and how to create one
Remember when I said in the first lesson that CiviCRM was created for the non-profit sector and can be highly customized? Well, now you’re going to see what I meant by that. CiviCRM allows you to create your own contact types but because the user-defined contact types are based on the three core types, CiviCRM refers to it as contact subtypes. For instance, Individual contacts can have subtypes like Volunteers, Interns, Alumni, Fellows, Pledged Donors… you name it, and one individual contact can be more than one subtypes, for example, someone can be an Alumni and a Pledged Donor. Or, as I sort of mentioned in the previous section, Organization contacts can develop subtypes for internal organizations such as departments, committees or teams, as well as external organizations such as partner or sponsor organizations.
Now, let’s now create some subtypes!
- Go to Administer> Customize Data and Screens> Contact Types

- Click on “Add Contact Type”
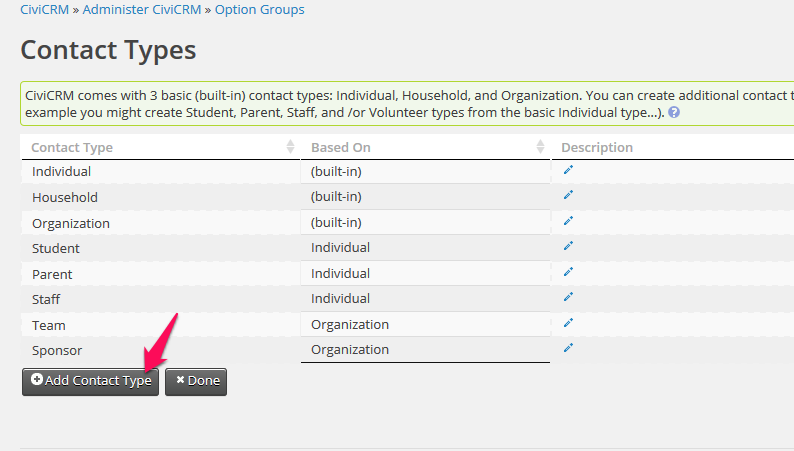
- Fill out the fields and click “Save”

- Voila, a contact subtype is created!

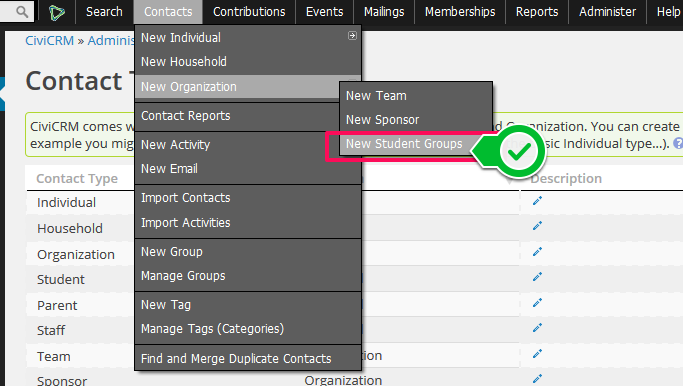
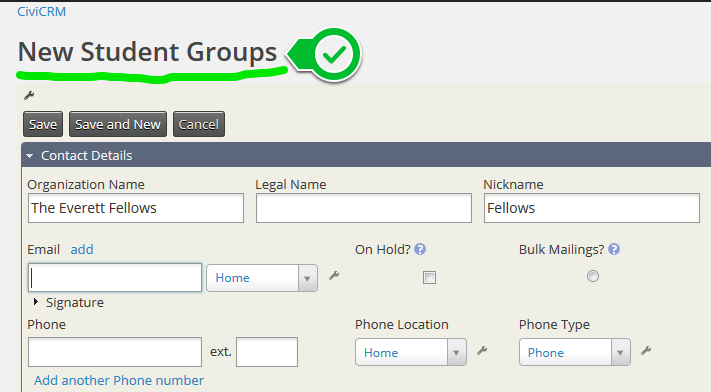
- When you go to Contacts>New Organization, it will show the subtype you created
- You can now create a group that fits the subtype!
Organize your contacts with Groups and Tags
I made a brief comparison between Groups and Tags, and organization contact types, now lets take a closer look at Groups and Tags and how they can help you organizing your contacts!
The major difference between Groups and Tags is that Groups integrates with CiviMail. You can send emails directly to a group or multiple groups, like so: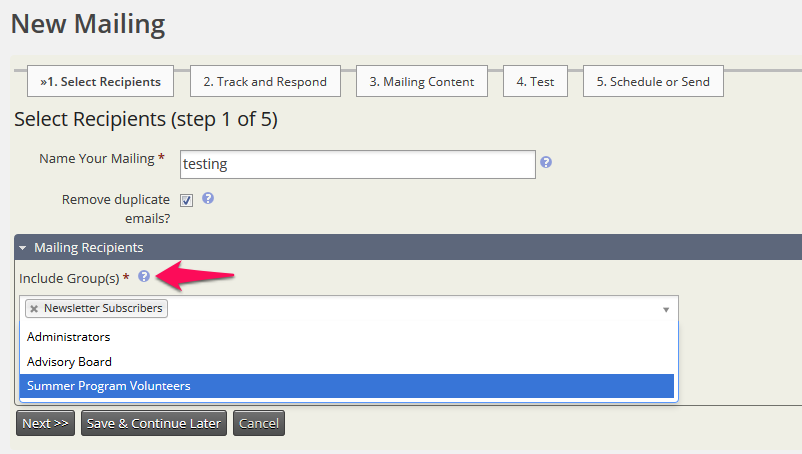
Therefore, you might want to see “Groups” as mailing lists, and organize your contacts with that concept. For instance, create a subscribers group to send newsletters, a members group to send member exclusive news, and a volunteer group to send volunteering opportunities.
On the other hand, Tags are more for contact searching purposes like so:
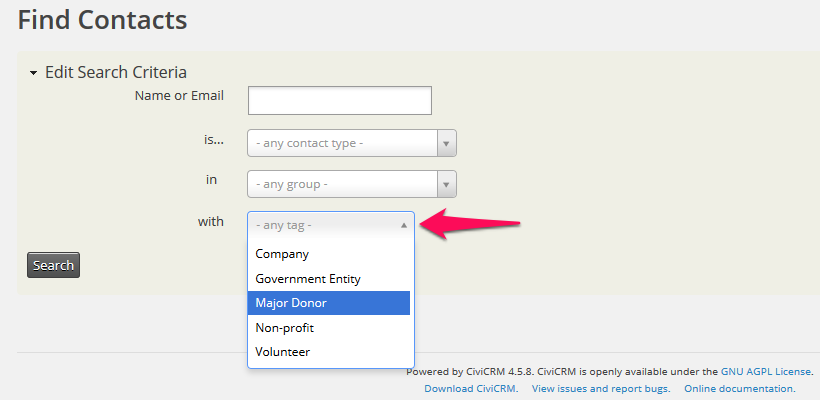
In the image above, you can see that it is also possible to search with Groups, and you might think “wait, so what’s so special about tags?” Let me explain this with a specific scenario: If today your organization is looking for some volunteers to make posters to promote your event, but you want to make sure the posters look amazing, you can search for contacts in the “Volunteers” group, with a “Art Major” tag, and send an email to contacts with the criteria. Depending on your needs and the population you are working with, you may create tags based on residential location, field of work, career position, etc. Use tags wisely, and it will help you find the right people when you need them!
Importing contacts
If you’re an existing organization and want to switch to CiviCRM, you may import your contacts in bulk with a CSV file instead of adding them one by one. However, by now, you should already know how much information CiviCRM allows its contacts to contain, and what you’ve been keeping track of in the past years may not fit into CiviCRM’s format right away, so some tailoring will be required in order to make the importing process and results as successful as possible. I cannot tell you how exactly you should do this because it really depends on what you have in hand. But, if you’re working with a non-profit, and you’re helping them to import their existing contact data, please refer to CiviCRM’s users book for a better understanding of what to prepare for, and how to maximize the function.
Importing contains four major steps: Upload Data , Match Fields , Preview , and Summary. The links will bring you to the CiviCRM wiki pages of each topic. They explain the importing process and what each button and check box does clearly. I highly recommend you to read through them or refer to them when you’re importing contacts. I’ve made some screenshots of my importing process below. Your steps will be different from mine, so this is only an example of what importing data looks like:
- First of all, if you have been keeping your contacts in a excel sheet or Google spreadsheet, save it as a CSV file.
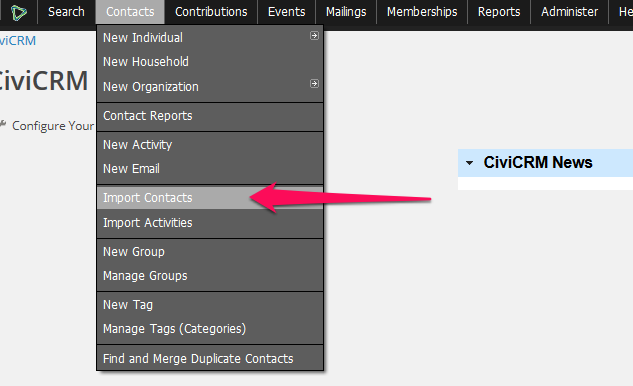
- Go to Contacts> Import contacts, and upload your CSV file

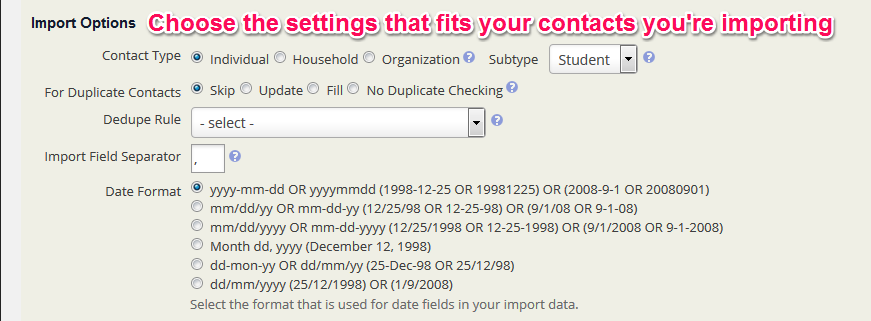
- Follow the instructions and choose the settings that fits your data, then proceed to the next step
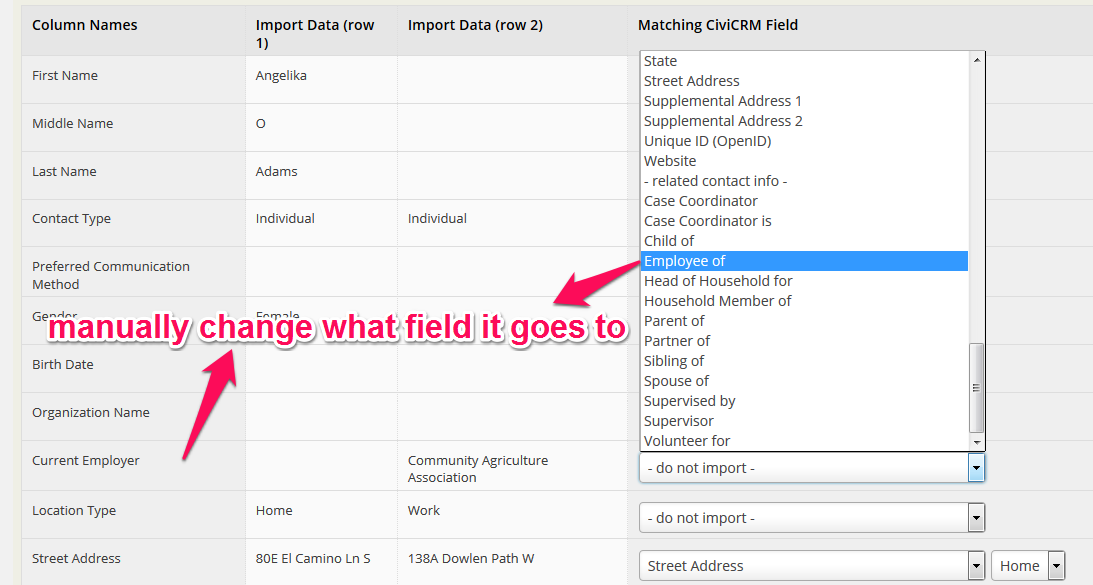
- Make sure the information you uploaded will be imported to the right fields
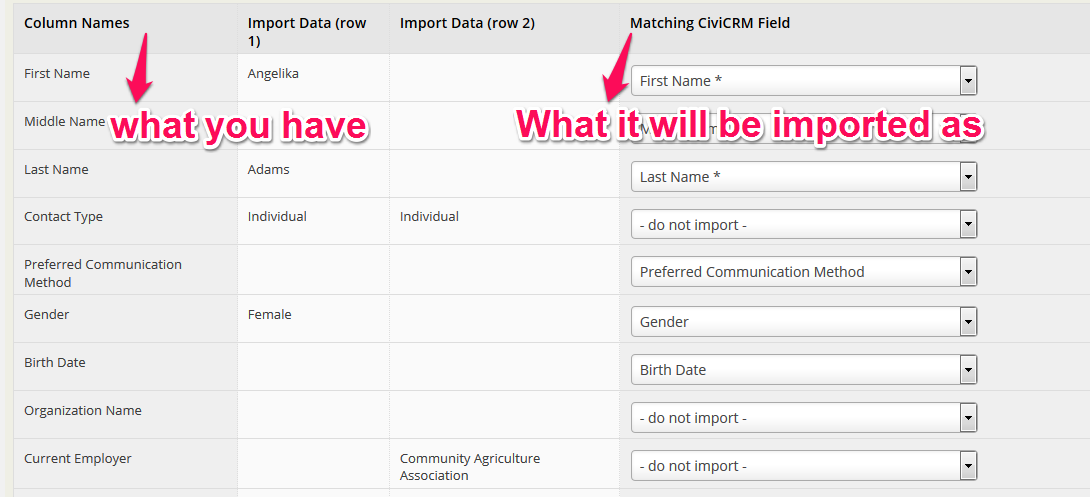
- You can also change some of the fields to fit your needs
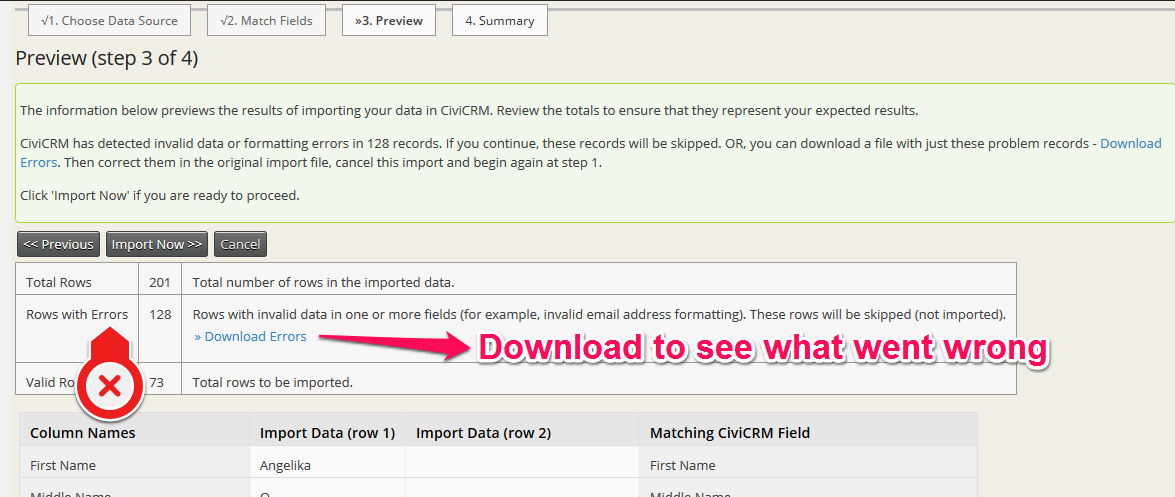
- The preview step shows you if errors occur. If it does, you can download the error report, and check what went wrong.
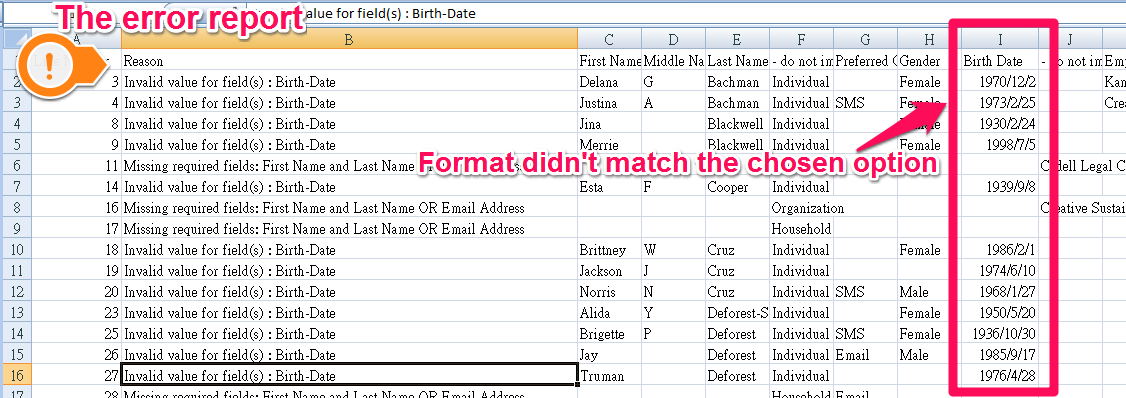
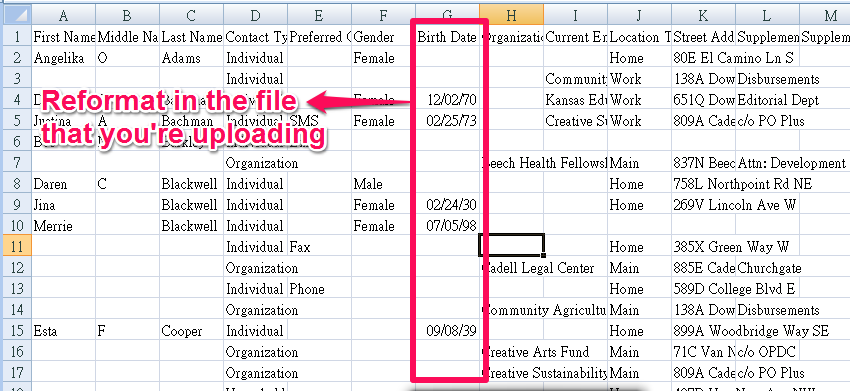
- In my case, the “birth date” format didn’t match the date format I chose in step 3. However, none of the options CiviCRM offers matches my data, so I had to reformat my data.
- Once you clear the errors, repeat step 1-6. You may still import with errors, but those contacts will be skipped. For the best results, I recommend you to fix every errors that occur.
- When you finish importing, CiviCRM tells you how many contacts you’ve imported, and whether changes have been made to your existing contacts in the system.

Search Contacts
There are a few ways to search for contacts on CiviCRM, such as “Find Contacts”, “Advanced Search”, and “Custom Searches”, and they can be found under the “Search” tab. All of them are useful and efficient, but depends on the contacts you have and which contact you’re looking for, you will have to evaluate which search method to use. The following are some steps and example of how to use these search functions.
- Under the “Search” tab, you’ll find all the search functions, but I’m just going to introduce three of them:
- “Find Contacts” is the most simple and straight forward method. Just enter your search criteria, or if you want to see all of the contacts, leave the fields blank and hit “Search”

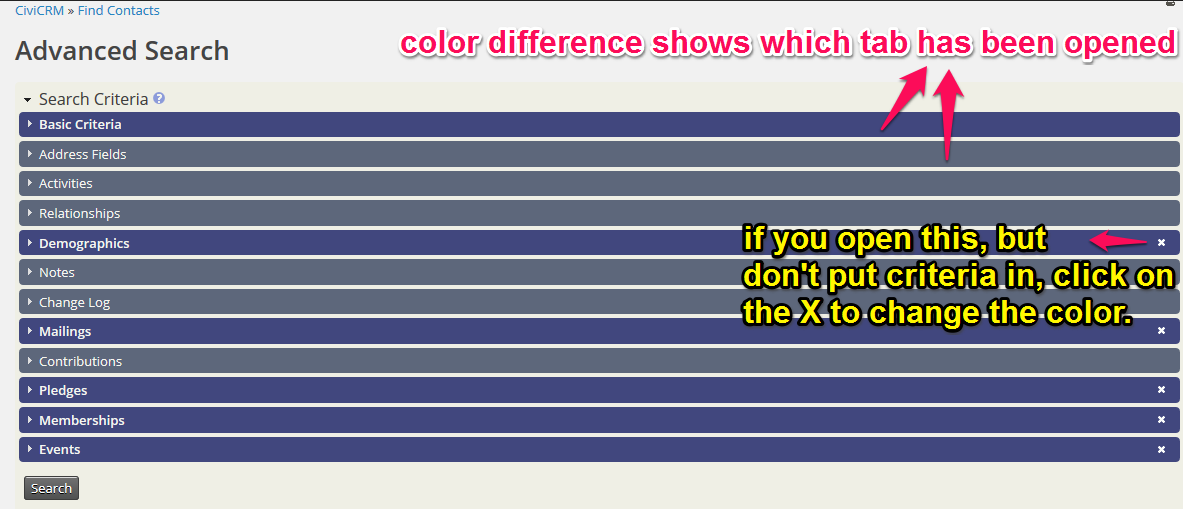
- “Advanced Search” looks a lot fancier and complex than “Find Contacts”, but it’s very useful. You can expand the tabs and check out what restrictions you can set to your search result. You can also set multiple restrictions to multiple tabs at once. If you want a defined search result, this is the go-to method.
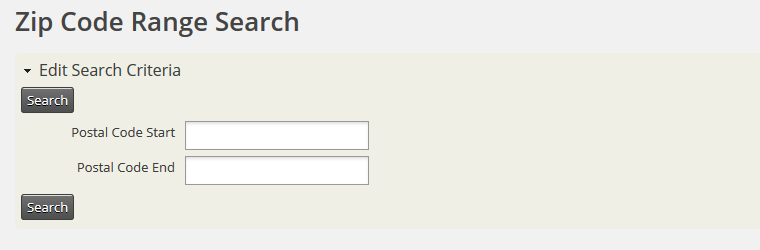
- “Custom Searches” are a list of pre-designed search methods. This is good for the searches that you perform frequently or regularly. It saves you time if you use the custom searches instead of the advanced search.
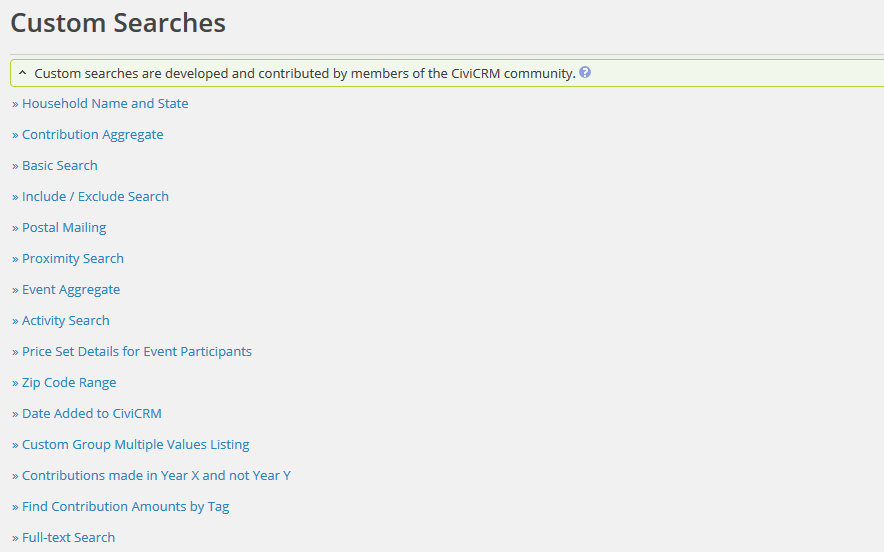
- This is an example of what these custom searches look like. They look much simpler than the “Advanced Search”, but more defined than “Find Contacts”. For customization and user-defined “custom searches”, we will talk about that later in the lesson.
Edit Contacts
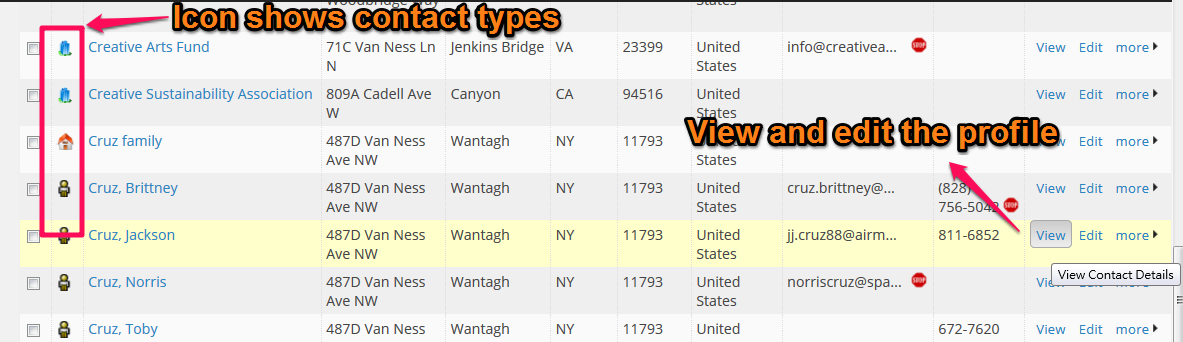
- When you search contacts, your search result will look like the image below, and you can view and edit the contacts.
- When you are viewing a contact’s summary, move cursor to the field you want to edit, and click
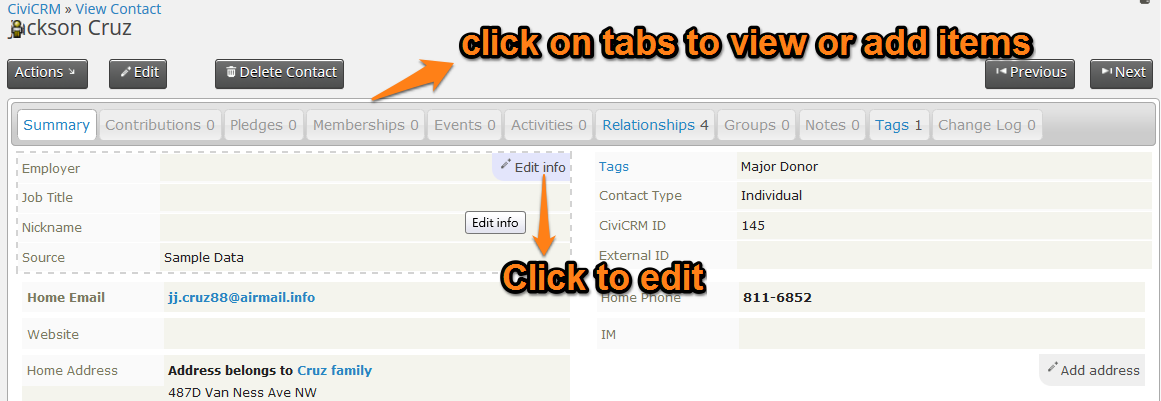
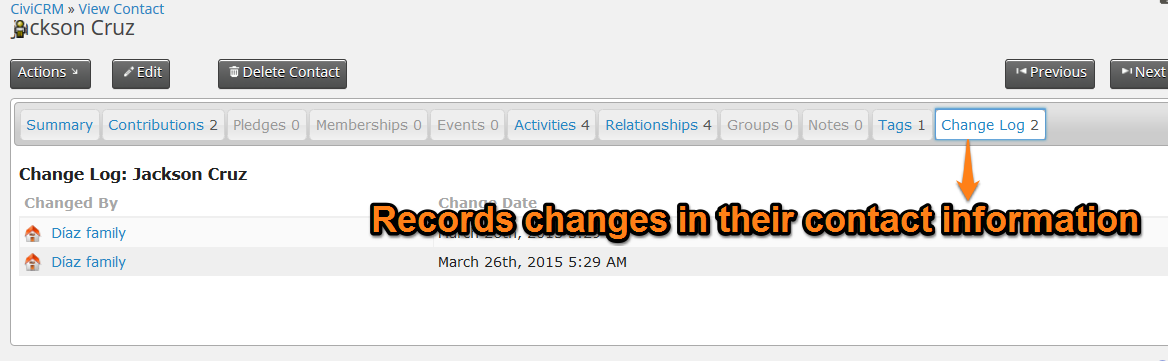
- If you change the contact information, it will be recorded in the Change Log
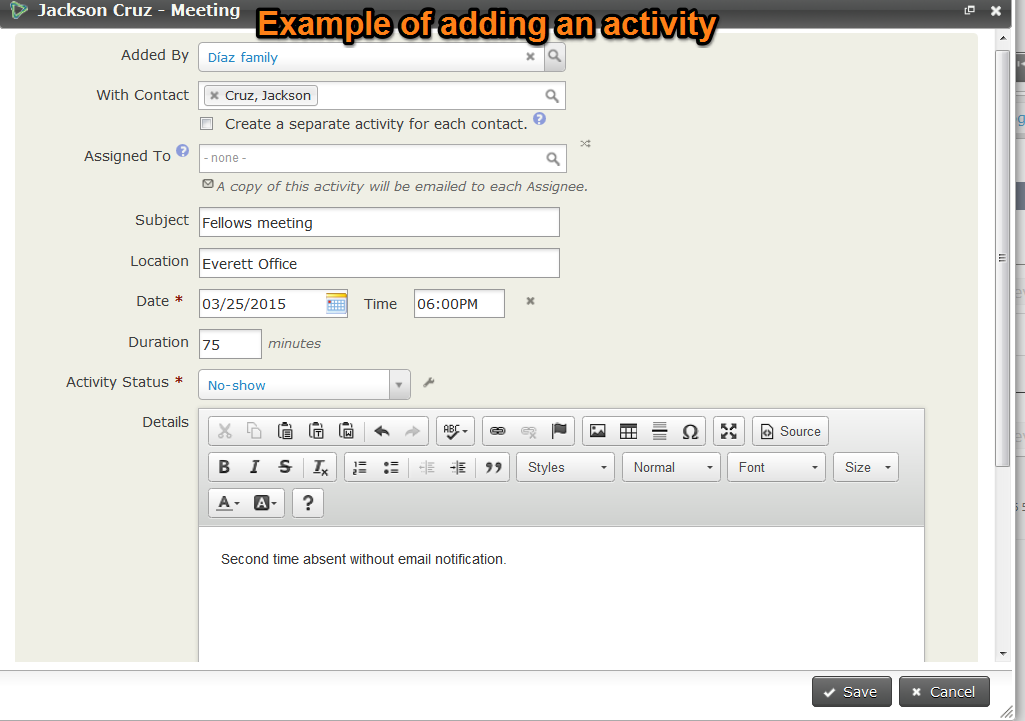
- You can also add items to other tabs. Here are two examples:
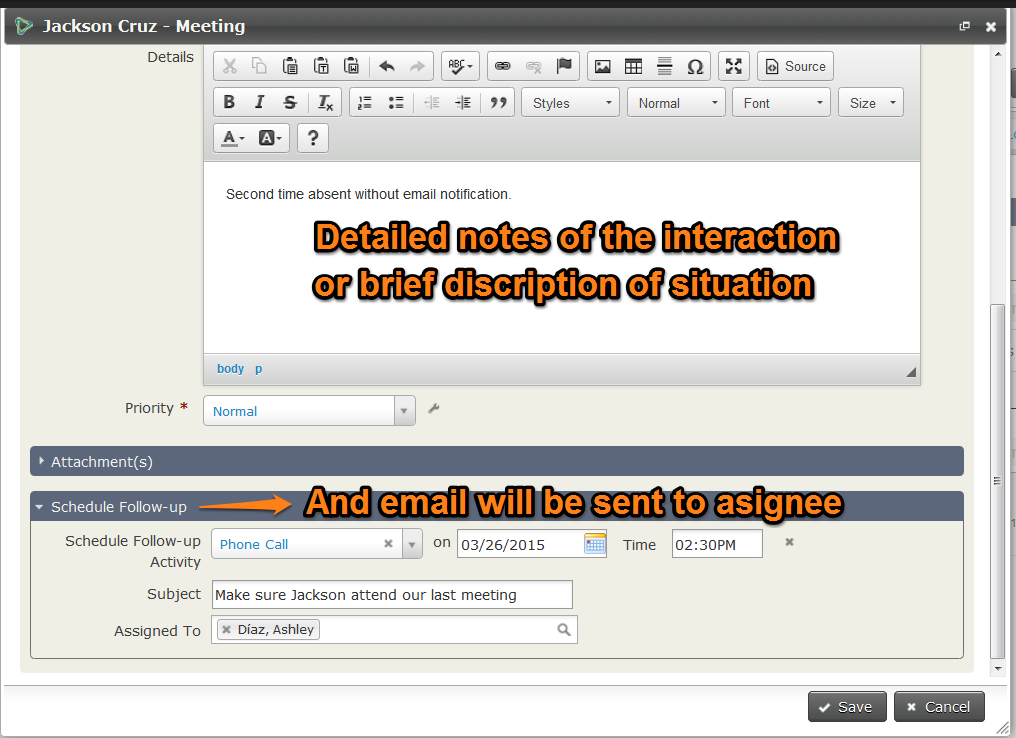
Adding an activity: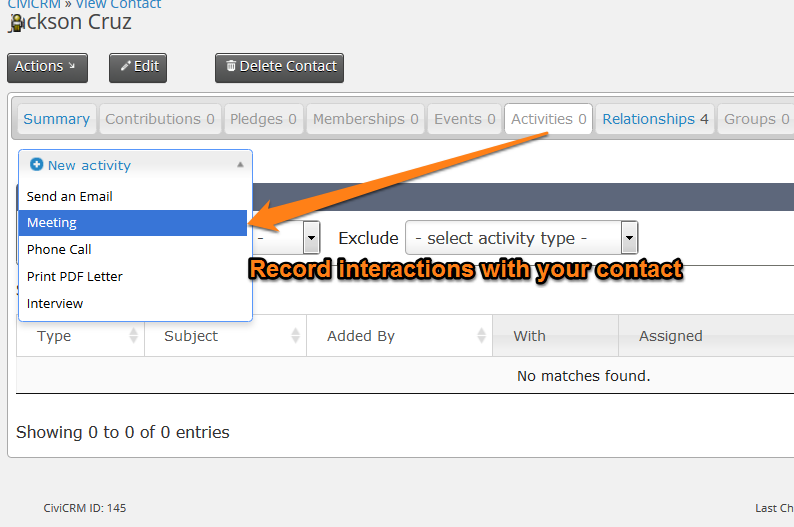
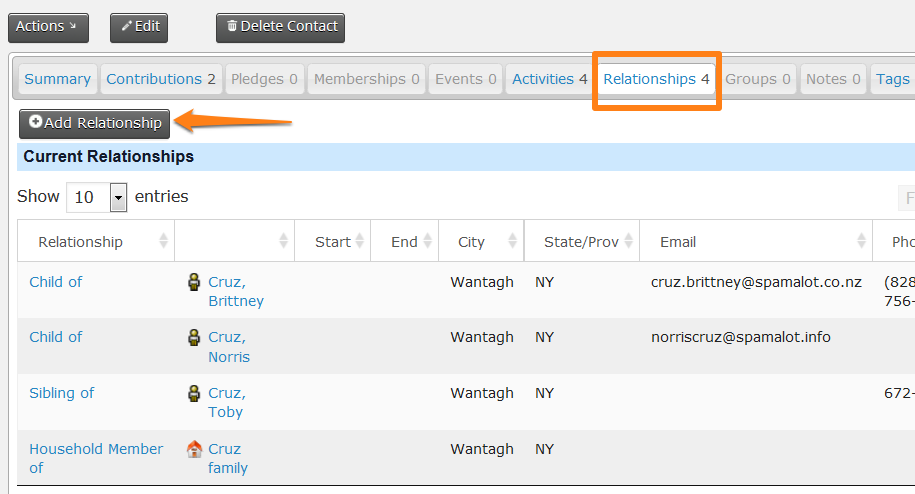
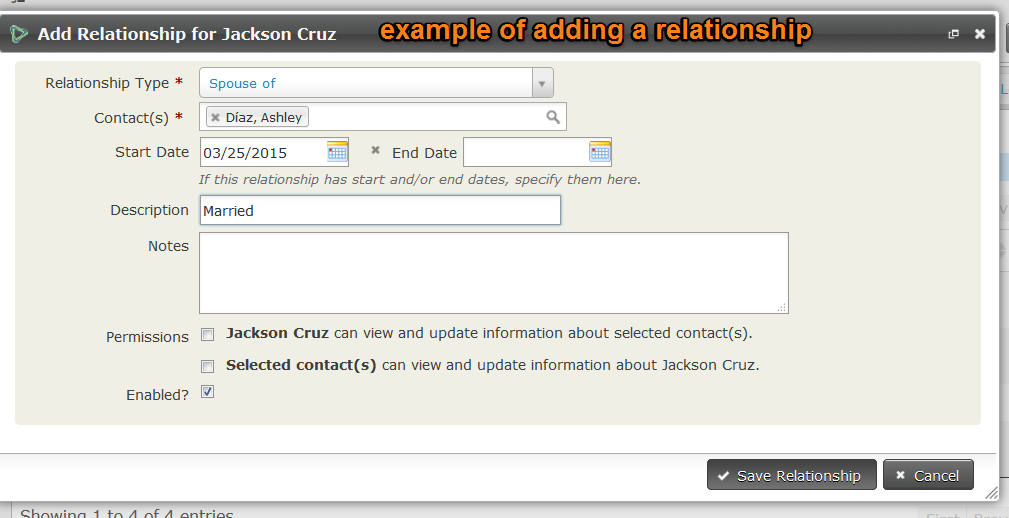
Adding a relationship:
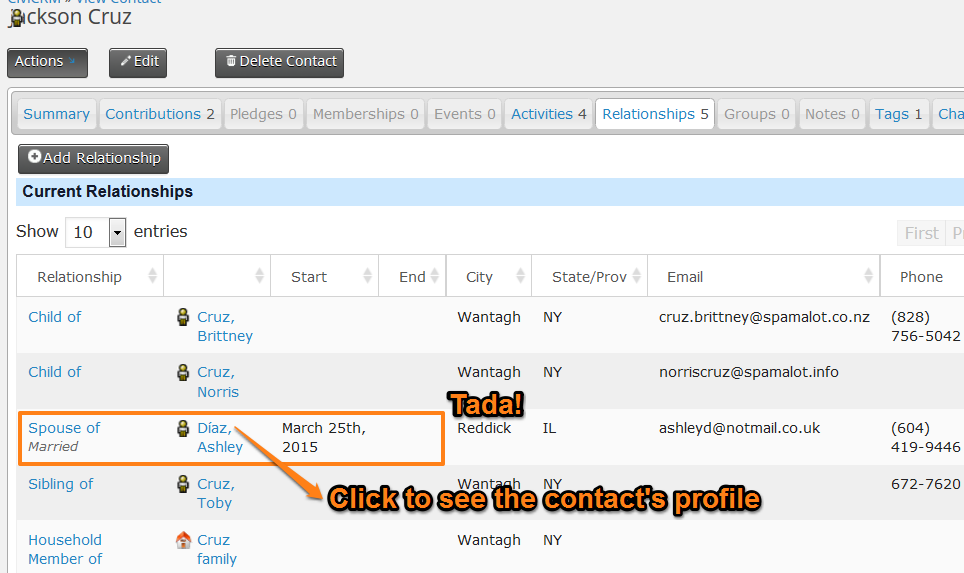
Let’s visit Ashley’s profile to check whether the relationship has been added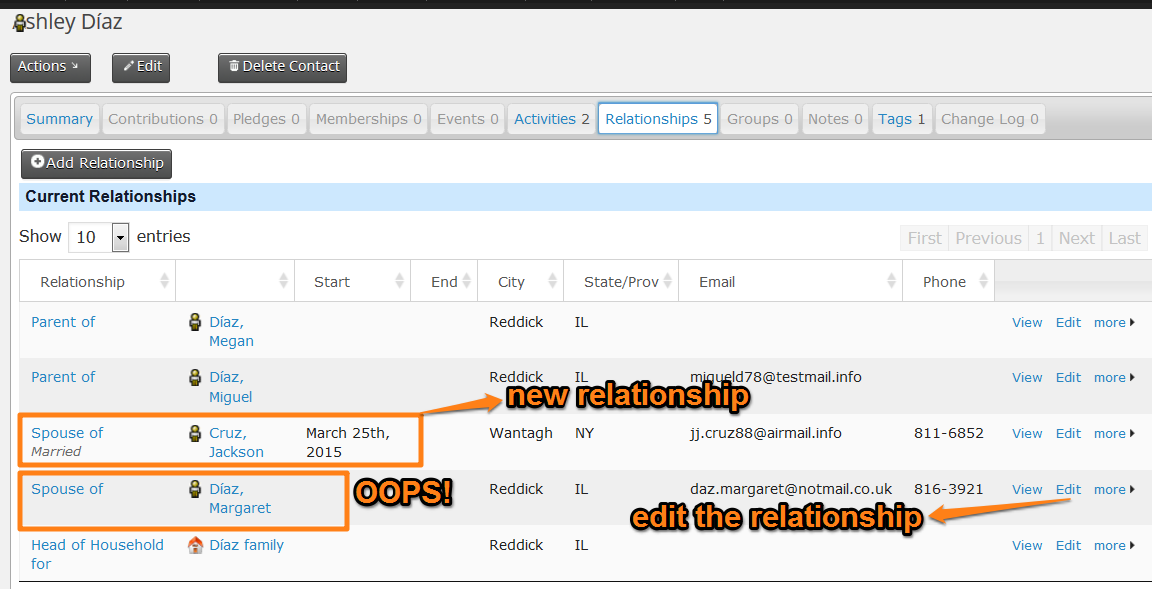
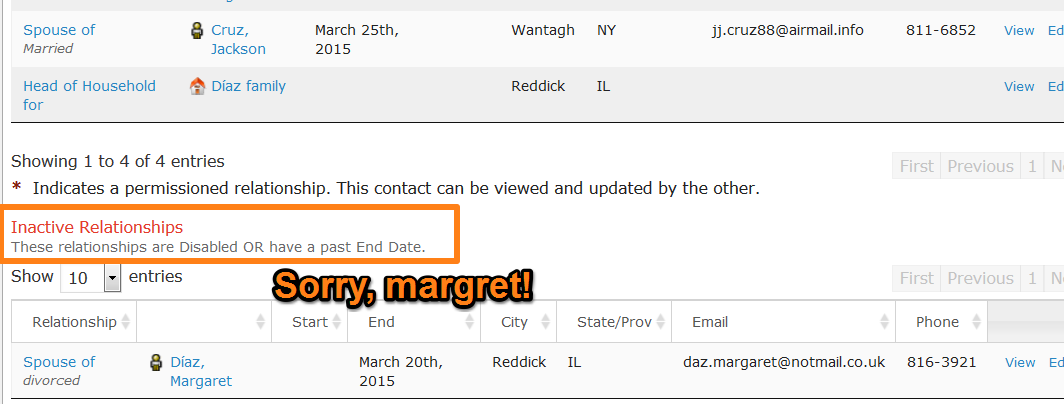
It did, but turned our she was married to someone else….which means we need to edit the relationship.

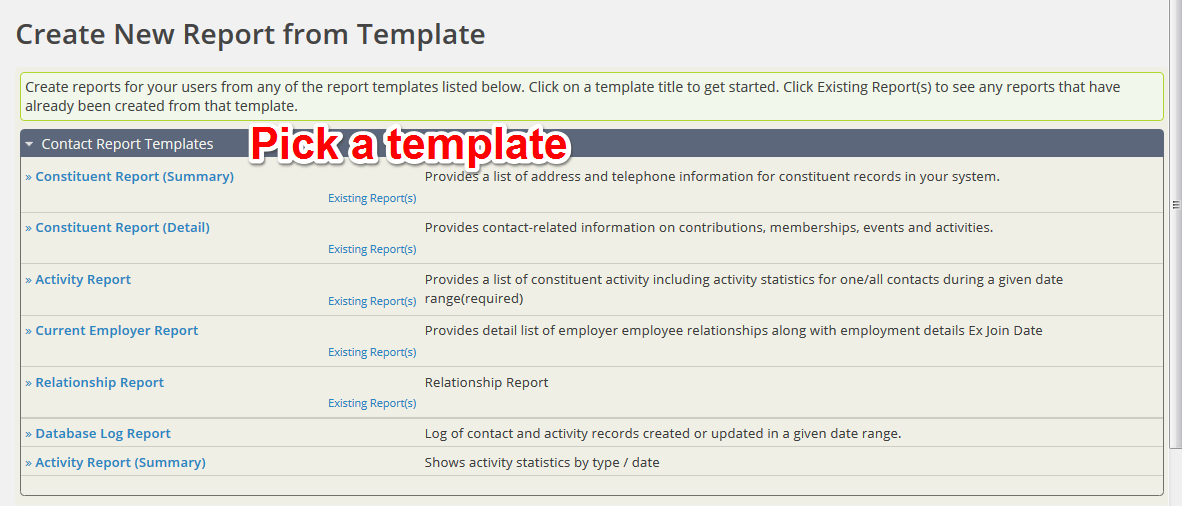
Create and customize contact reports
Contact reports are, in a sense, similar to searching contacts, but with reports, you can have apply detailed filters, and control what information is displayed and exported. CiviCRM provide a number of report templates as basis for your customized reports. Similarly to the concept of contact types, the customization is based on CiviCRM’s existing structure. Different templates provide different filters, the following is a simple illustration of the process of creating a contact report. Depending on which template you pick, yours might look different.
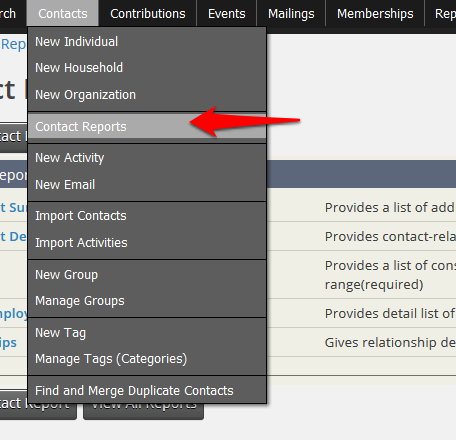
- Go to “Contacts”> “Contact Reports”
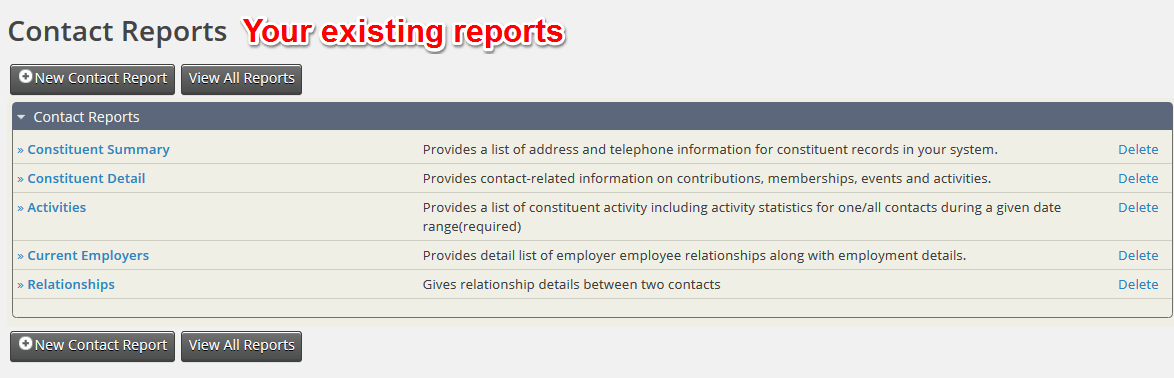
- The list of contacts reports shows your saved reports, but for now, because we haven’t created new ones, it shows you the ones with default template settings. Click on “New contact Report” to create a customized report.
- Pick the template that fits your needs the most.
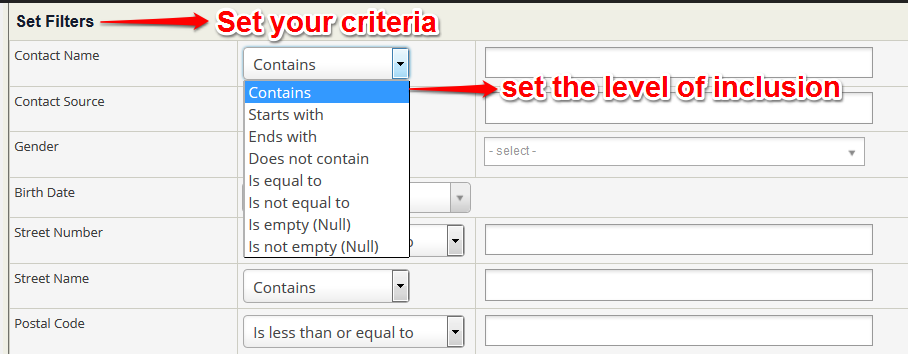
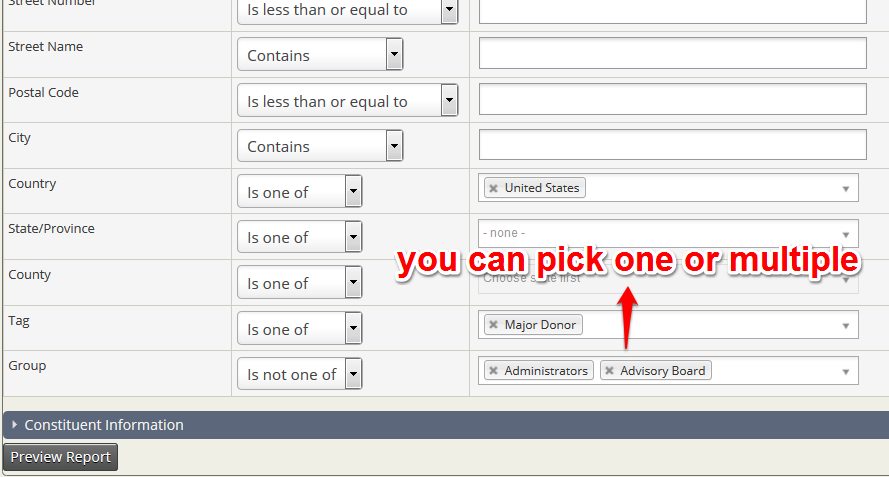
- You begin with deciding what information is displayed in your reports.

- Then, create filters for you report. You may set the level of inclusion or restrictions. Some fields allow you to contain more than one value. When you’re done, click on “Preview Report”.
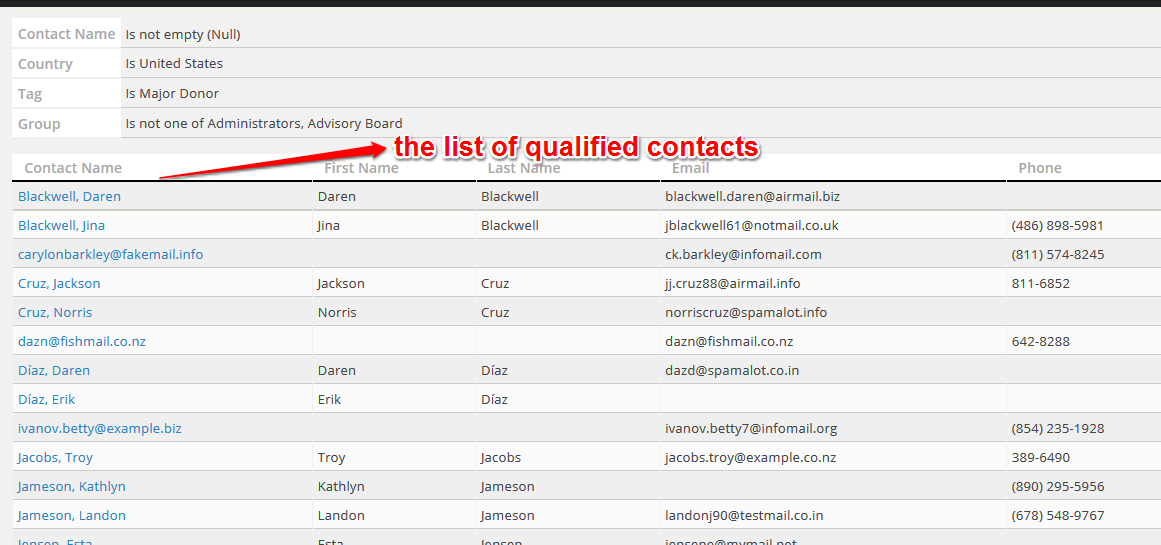
- At the very bottom, it shows the contacts that fits into your criteria.
- If you think you are going to use the some report in the future, you can save the report by filling out the “Create Report” tab. (It says “Report Settings” in the image because I used one of the existing report from the list instead of creating a new report from scratch)
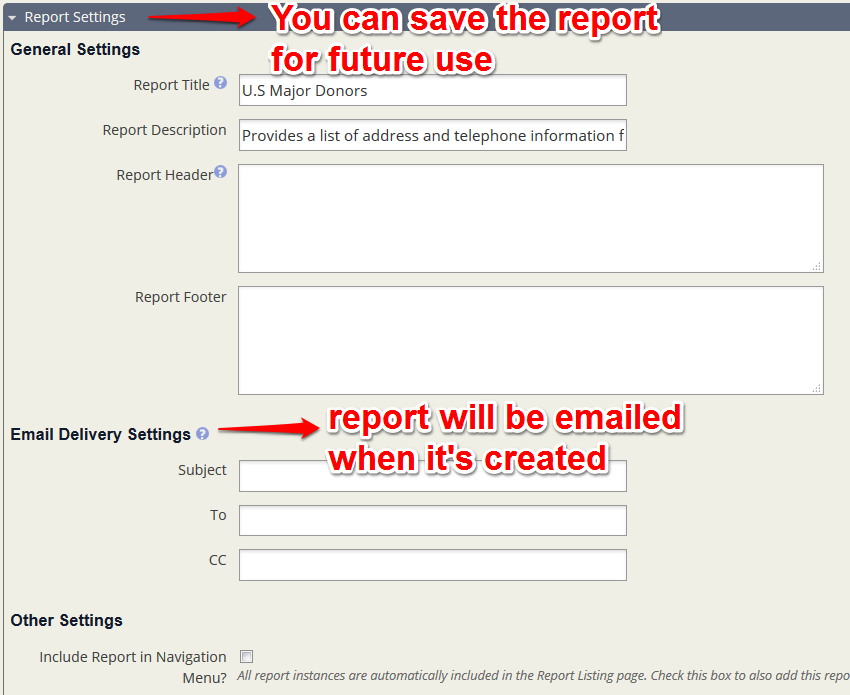
- If you used one of the existing reports, you can either update the setting, or save the report as a new one. For new reports, it only has the “Create Report” button. But the export option is the same for both.
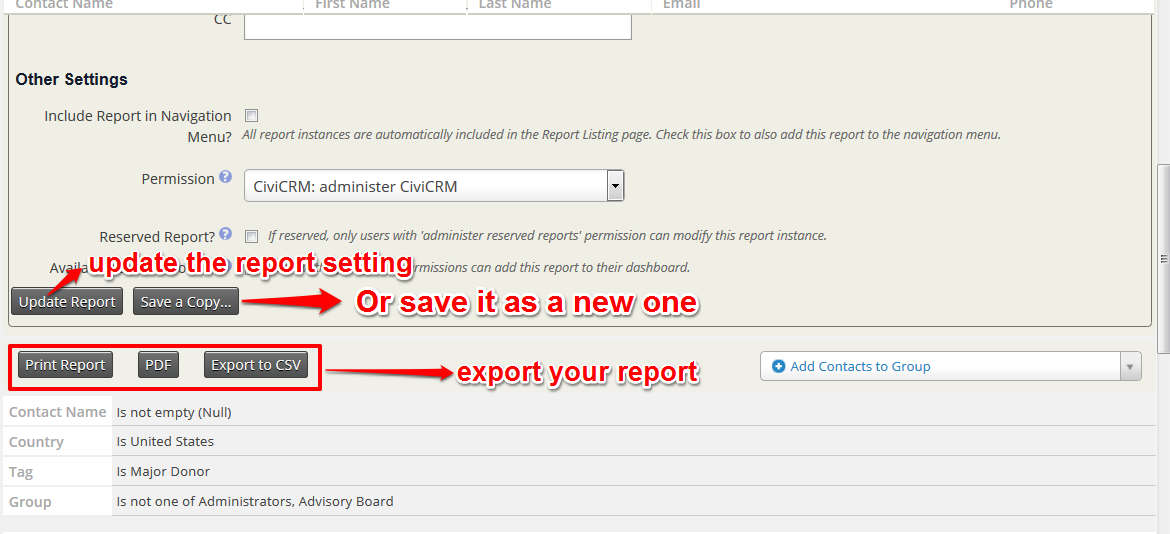
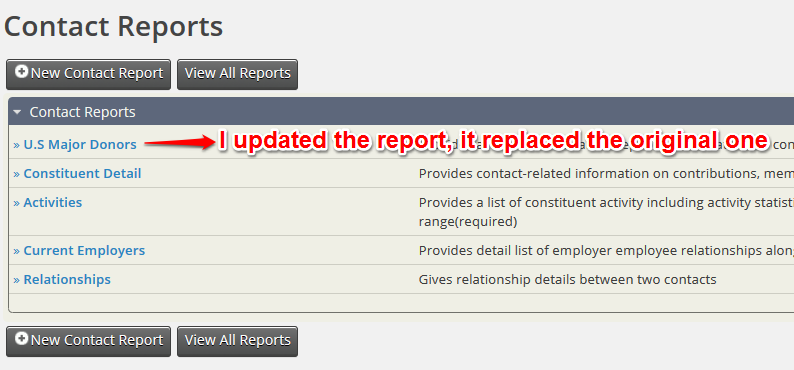
- I chose to update the Report, and this is the result:
Other Configurations and Customization
Although CiviCRM is a well-developed and thoroughly designed tool for non-profits, we all know that there is no one model that fits all needs, and that’s why CiviCRM allows users to fine-tune some of the items, display, and more. You can also delete some of the existing items that you don’t want. Since this lesson is about Contacts, I will only briefly introduce the fine-tunings that revolve around contacts. Some of them are straight forward, so I will give you minimal introduction and instructions on them. All of these items can be found in “Administer”> “Customized Data and Screen”
- Custom Fields: If the fields in Contacts aren’t enough for you, or you want to get a hold of some more information of your contacts, you can create a customized field to fit your needs. The Custom Fields can be created to one specific contact type or subtype, which I believe makes the idea of creating contact subtypes more clear. Custom fields can also be created for other CiviCRM components. Here is an example of how Thomas created and used custom fields to fit the need of Everett Program. (I highly recommend you read it!)
- Relationship types: If you desire to record a certain relationship of your contacts, you can add relationship types here. (Ex: cousin, uncle, grandparent, etc.)
- Dropdown options: When you’re filling out a new contact, some of the fields require you to fill them in, some are check boxes, and some are drop down lists. If you think that some drop down lists or check boxes don’t have the option you need, or they are too long or have excessive options, this will definitely help you. You can add or remove items in the following fields:
- Gender options: Please understand why gender binary doesn’t work. Learn about what gender identity options are queer and non-binary friendly.
- individual prefixes: tying back to the gender non-binary talk, here’s something to look at.
- individual suffixes
- Instant Messenger Services
- location types
- Mobile Phone Providers
- Phone Types
- Website Types
- Display Preferences: When you view a contact’s profile, what do you want to be displayed and what can be edit.
- Custom Search Options: We talked about this earlier in the lesson, custom searches can be edited, disables, or deleted here. If you want to create one, please check out the website here.
Please note that these configuration and customizations should be completed before you import your contacts to CiviCRM. It’s like when you buy a new house, you want to model it to fit your preferences before you move in, so, make sure your CiviCRM is a comfortable and functioning nest for your contacts before you import them. That being said, before transferring all the data to CiviCRM, you will need a brainstorming/analyzing process to figure out how you want your data to be organized and categorized in CiviCRM.
Posted in: Lab Lessons
Comments are closed.